Configure Active Directory Rights Management Service (AD RMS)
Before you configure AD RMS, you need to:
- Install the AD RMS server on a Windows Server 2008 member server of the same Active Directory Domain..
- Install Windows Server 2008 Enterprise edition on two member server of the same domain. These servers will host AD RMS policy servers..
- Install Windows Server 2008 Enterprise edition on a member server of the same domain. This server will host SQL Server 2005 as a database server.
- Reserve a few URLs for the AD RMS cluster that neither include a computer name nor use localhost and will be available throughout the lifetime of the AD RMS installation. Use different URLs for internal and external computers.
- Create some domain user accounts and configure E-mal addresses for them in AD DS.
- Create a standard user account as a service account and add it to Local Administrators group
- Create a domain based service account and assign the Generate Security Audits user right to it.
- Create a domain based user account that has local administrator privileges for installing AD RMS. Ensure that the account is not on the smart card. If the account needs to be used to generate server connection points then it must be a member of Enterprise Admins group and if it needs to use external database then it should be a member of System Administrators role on DB server.
- Obtain secure sockets layer (SSL) certificate for the AD RMS cluster.
- Store the cluster key in the AD RMS configuration database.
- Create custom DNS alias (CNAME) record for the AD RMS cluster URL and for the database server.
Install AD RMS
- Click Start-> Administrative Tools->Server Manager-> Roles Summary-> Add Roles
- Click Next on the first page of the Add Roles Wizard that appears.
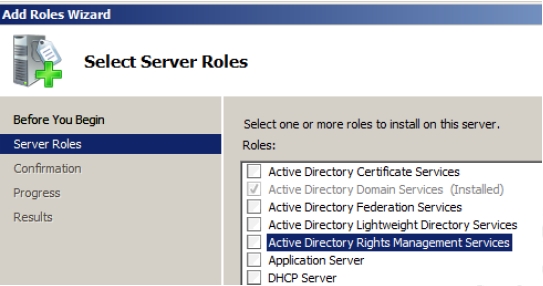
- Select Active Directory Rights Management Services option on the Select Server Roles page, as shown in Figure 4-29.

Figure 4-29 - Click Next. The role services page appears.
- Ensure that Web Server (IIS), Windows Process Activation Service (WPAS), and Message Queuing options are selected and then click Add Required Role Services.
- Click Next. the AD RMS introduction page appears
- Verify that the Active Directory Rights Management Server is selected on the Select Role Services page and click Next.
- Select Create a new AD RMS cluster option and click Next on the Create or join an AD RMS Cluster page that appears, as shown in Figure 4-30.

Figure 4-30 - Select the Use a different database server option and then browse the name of the computer that is hosting AD RMS databases and then click Next.
- Click Select to locate the database server and type the name of the database server, click Check names and then click OK.
- Choose the appropriate database instance from the Database Instance dropdown, click Validate and then click Next.
- Click Specify and then type the domain user account and password that should be used as the AD RMS service account on the Specify Service Account page that appears, as shown in Figure 4-31.
- Click OK, and then click Next.

Figure 4-31 The Configure AD RMS Cluster Key Storage page appears.
- Ensure that the Use AD RMS centrally managed key storage option is selected, and then click Next. The Specify AD RMS Cluster Key Password page appears.
- Type a strong password in the Password field, rewrite the password again in the Confirm password field, and then click Next. The Select AD RMS Cluster Web Site page appears.
- Select Default Web Site or select the web site where the AD RMS Web services will be installed and then click Next. The Specify Cluster Address page appears.
- Select the Use an SSL-encrypted connection (https://) option.
- Type the FQDN name of the AD RMS cluster in the InternalAddress field, and then click Validate. If validation succeeds, the Next button becomes active.
- Click Next. The Choose a Server Authentication Certificate for SSL Encryption page appears.
- Select the Choose an existing certificate for SSL encryption (Recommended) option, select the appropriate certificate or click Import to import the certificate, and then click Next. The Server Licensor Certificate page appears.
- Provide a name that helps you identify the AD RMS cluster in the Friendly name field, and then click Next. The Register AD RMS Service Connection Point page appears.
- Ensure that the Register the AD RMS service connection point now option is selected, and then click Next. This action will register the AD RMS service connection point (SCP) in AD DS. The Introduction to Web Server (IIS) page appears.
- Click Next. The Select Role Services page appears.
- Accept the defaults and click Next. The Confirm Installation Selection page appears.
- Review your choices and then click Install.
- Click Finish when the installation completes.
- Log off from the server, and then log back again. Update the permissions granted to the logged on user account.This user account will automatically become a member of the AD RMS Enterprise Administrators group.
